
Quick Tip: Managing Subscriptions with Gmail
It’s likely that you have several subscriptions to newsletters and email blasts from various websites. And if you’re anything like me, you don’t like a lot of things cluttering your inbox. Today I will tell you how to use Gmail to manage your subscriptions.
Using the + Sign
A nice built-in feature of Gmail is that you can append anything to your email address by adding a plus sign (+) to it. For example, if I want to keep track of all my client emails, I could give them the email address myemail+clients@gmail.com and it will get sent to my Gmail inbox.
With that in mind, whenever I sign up for a newsletter or email blast, I use myemail+subscriptions@gmail.com.
You can then use Filters in GMail to route emails sent specifically to those addresses to other folders, or even straight to trash!
How to Set It Up
To manage these subscriptions, in Gmail do the following:

- Click on the Cog on the right
- Select Settings -> Labels and create a new label called “Subscriptions”
- Click on the Filters and Blocked Addresses tab and scroll to the bottom. Click on “Create a new filter”
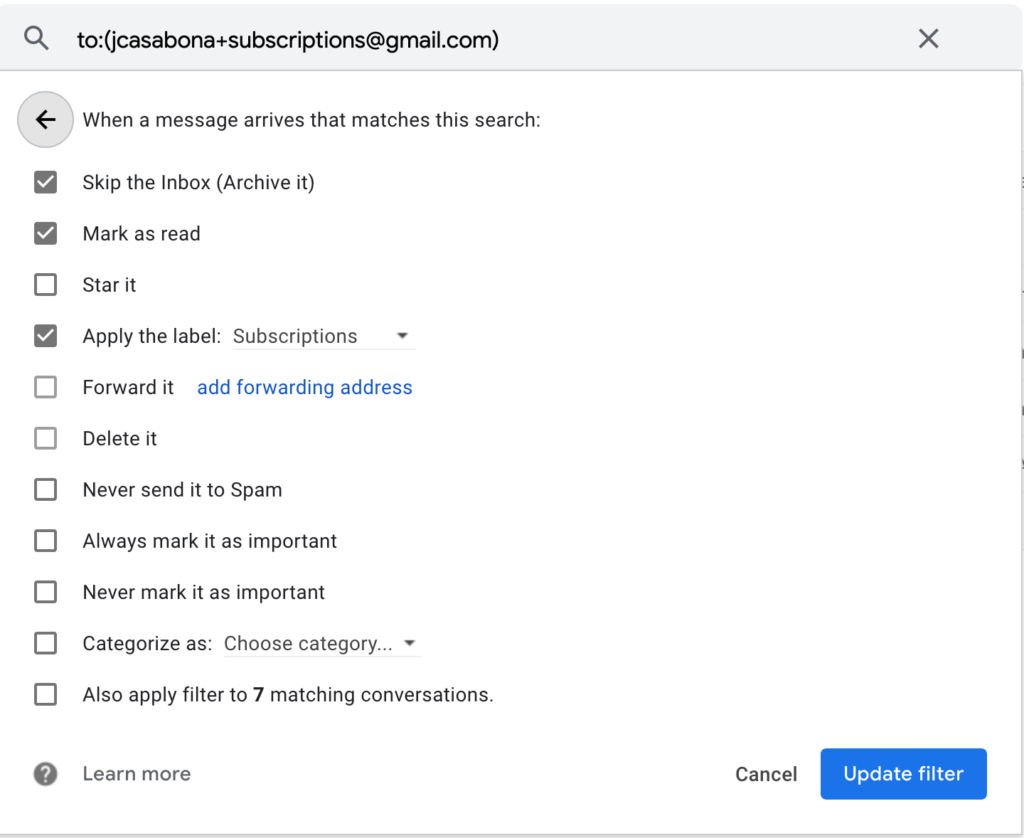
- In the “To” field of the “Create a Filter” box, put your email address with “+subscriptions” after the username (IE youremail+subscriptions@gmail.com)
- Click Next Step
- In the check boxes, select “Skip Inbox” and “Apply label,” then select “Subscriptions” from the drop down box.
- Click “Create Filter”
You’re All Set!
Now you won’t have your email subscriptions filling up your inbox, but kept in one spot for you to review when you’d like. Just remember to sign up for them with your ‘new’ Gmail address!
