My Podcast Setup and Process (Updated 2025)
I’m on record as saying gear matters least…but process matters most! SO if you’re interested in my podcast setup, from gear to publish, read on!
Last Update July 2025
Podcast Setup: Gear
First, let’s start with the fun part of the podcast setup – the gear. I’ll write everything here in the order in which the audio (my voice) hits the device, starting with the mic.
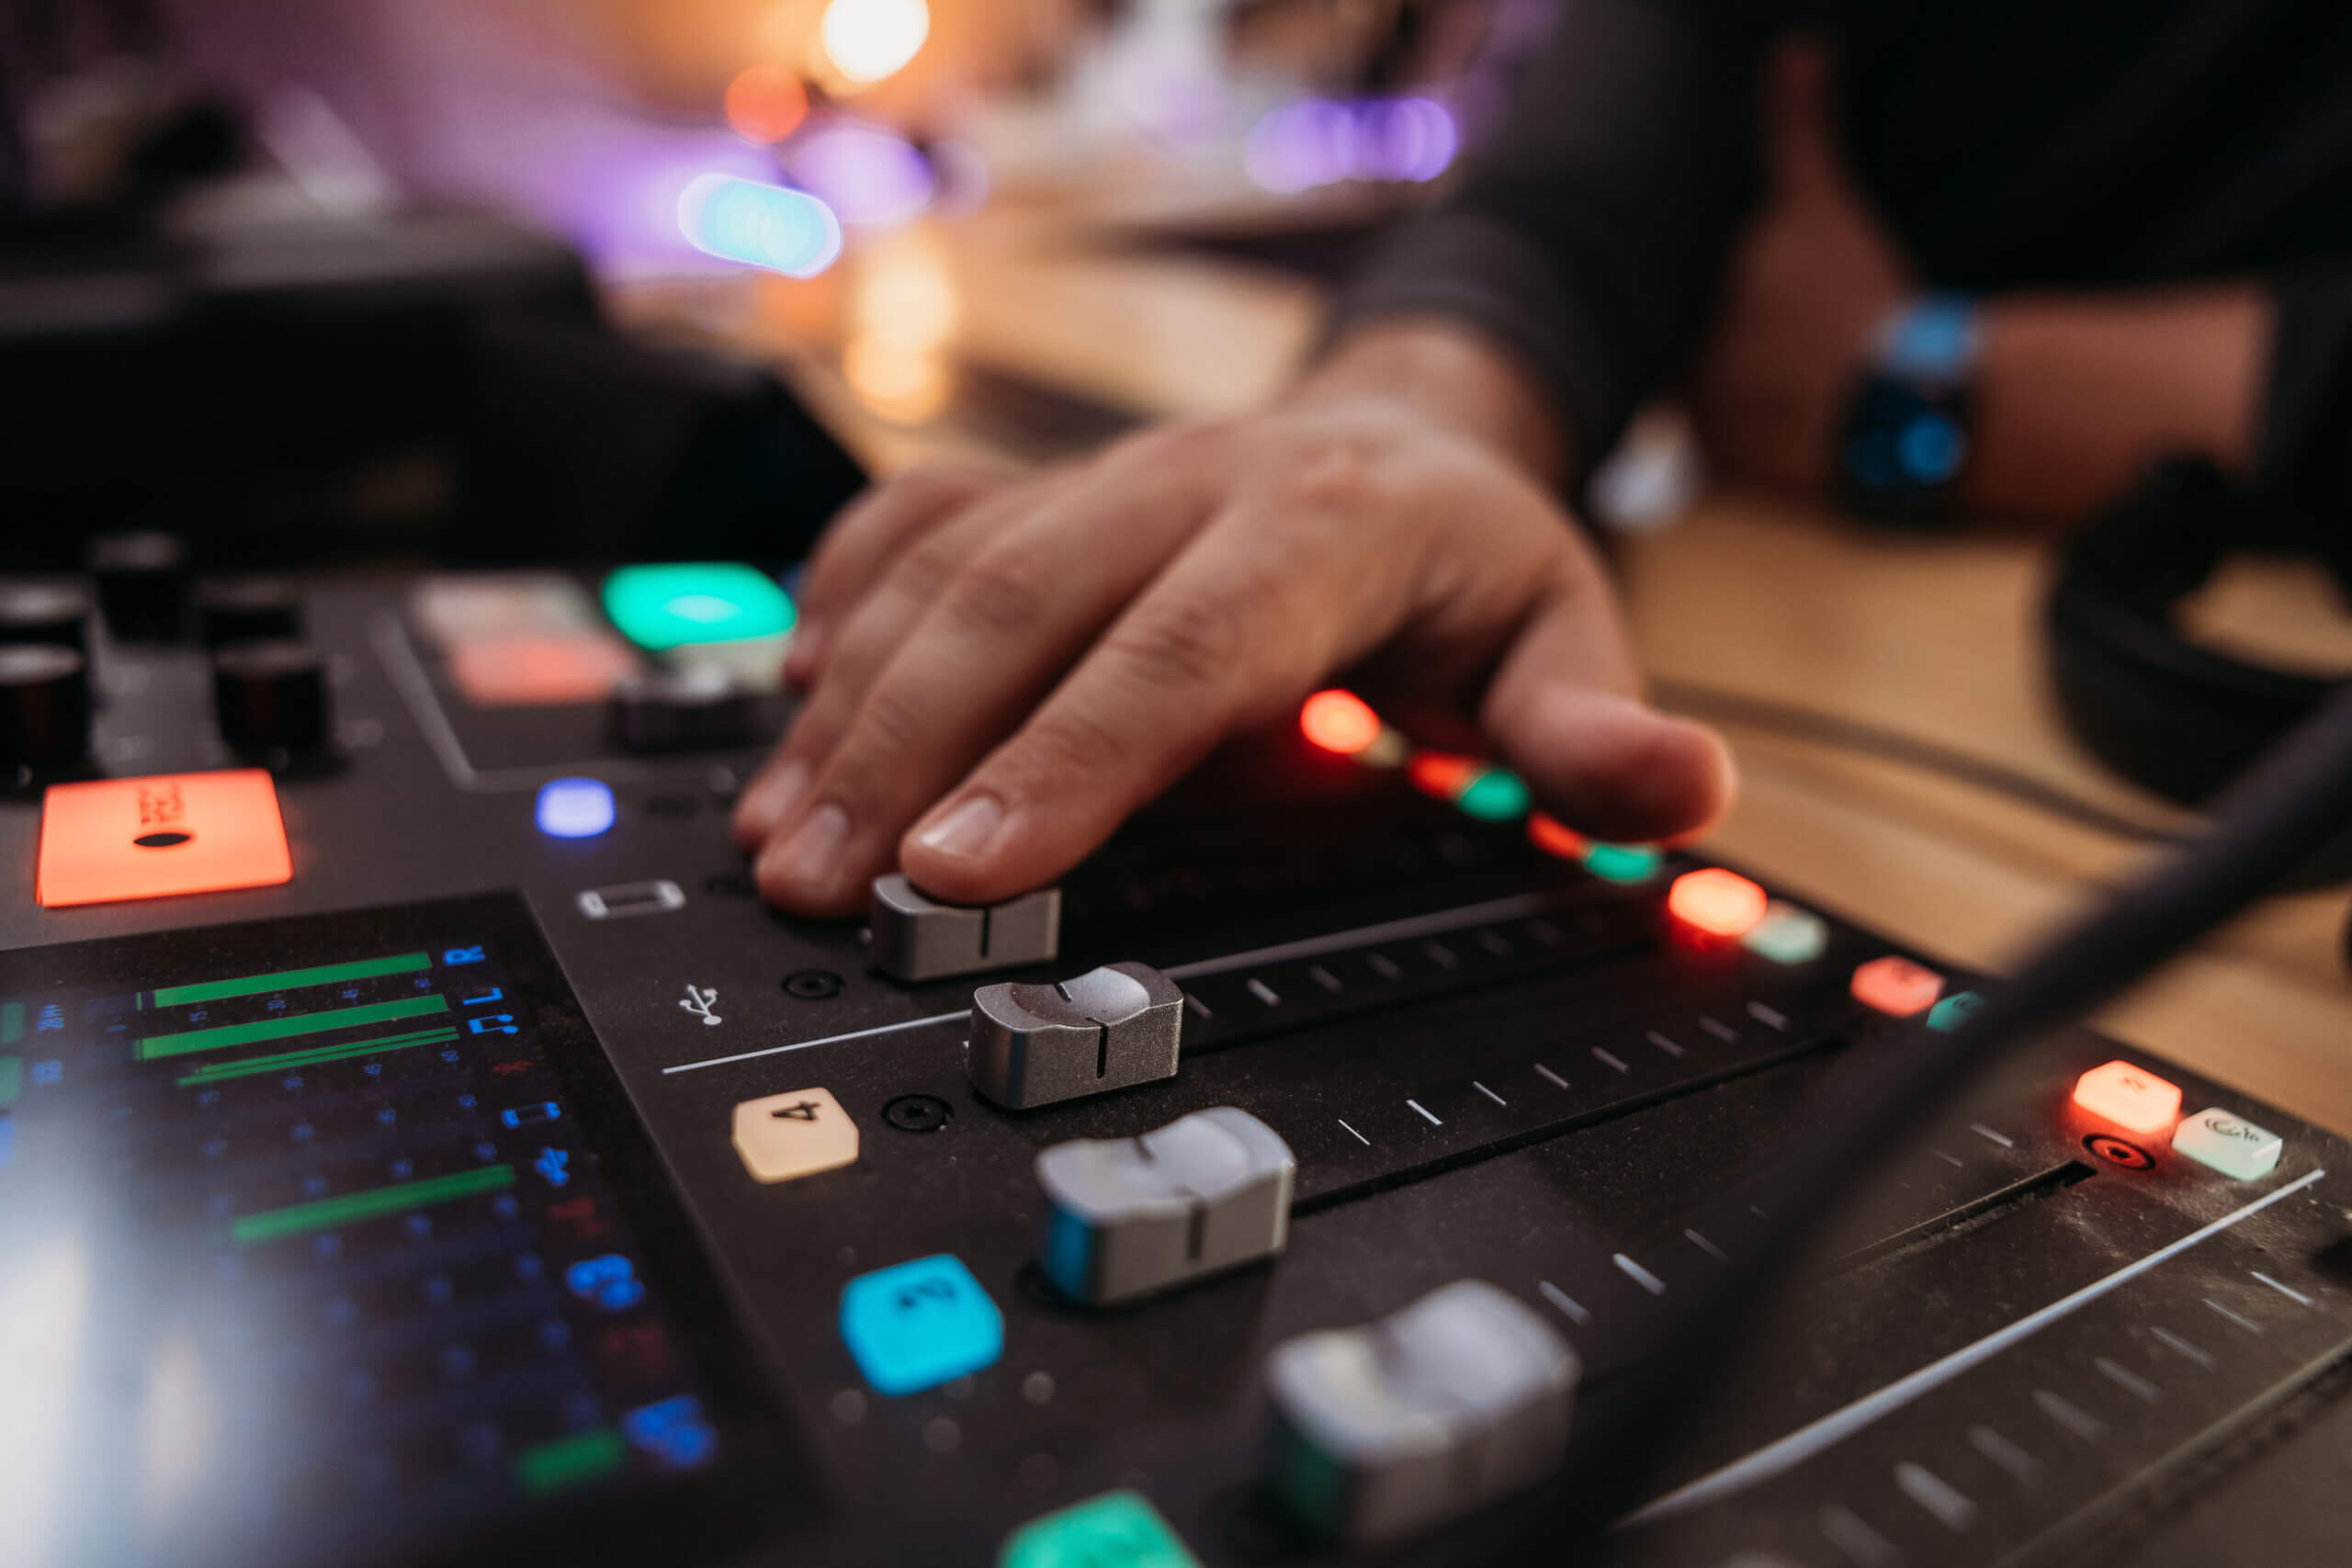
Microphone: Shure SM7B

My mic is the Shure SM7B, which I’ve wanted ever since I heard about it. I thought I could get away with the cheaper Rode Procaster, but in the end, the SM7B is better for my voice – it sounds more natural, less muddy (or muffled/deep).
This mic is also known by many as the “podcaster’s mic,” though it’s used by all sorts of professional vocalists, from Michael Jackson to the Pentatonix. This article breaks down why wonderfully.
Other Mic-Related Gear
- Wind Screen: The foam piece on the front of my mic protects it from hard breath sounds, wind, and plosives (hard P-sounds), improving the audio a bit. The SM7B comes with one specifically for podcasting / close talking, though I got this yellow one to match the brand.
- Elgato Wave Arm LP: This is what my mic is attached to. It keeps the mic off my desk, and gives me a lot of flexibility on placement, allowing me to improve my mic technique. I went with the Low Profile because it better keeps the mic and arm out of camera frame!
Preamp / Interface: Rodecaster Pro II

My current interface is the popular Rodecaster Pro II. It’s $600, but you get a full, 4-input podcast studio – you don’t even need a computer to record your show.
That said, it plugs right into your computer, and with the Rodecaster Pro software, you have lots of control over what tracks get recorded.
The thing I love about the this piece of hardware is that it gives you control over the processing, but you don’t need to be an audio engineer to use it – just a little knowledge will go a long way. With the Arrow, I felt like I didn’t know nearly enough about audio processing to use it to it’s full potential. Plus it fell down when I tried using it with multiple profiles on my computer.
All of that goes away with the Rodecaster Pro. So now I can dial my mics in just the I like, plus I can easily record to a microSD card as well. I’m a big fan so far. The only thing to keep in mind is that it has a big footprint. It’s basically an 8-channel mixer (4 mins, USB in/out, phone, Bluetooth device, and sound effects).
It also fits on a Vesa Arm, so that doesn’t sit on my desk either!
Also plugged in: my KRK Rokit 6 studio montiors with stands and wires, and DT 770 Pro monitor headphones.
Podcast Setup: Production Process
I try to be as hands-off as possible during my process, outside of the recording. Here’s how the whole process works.
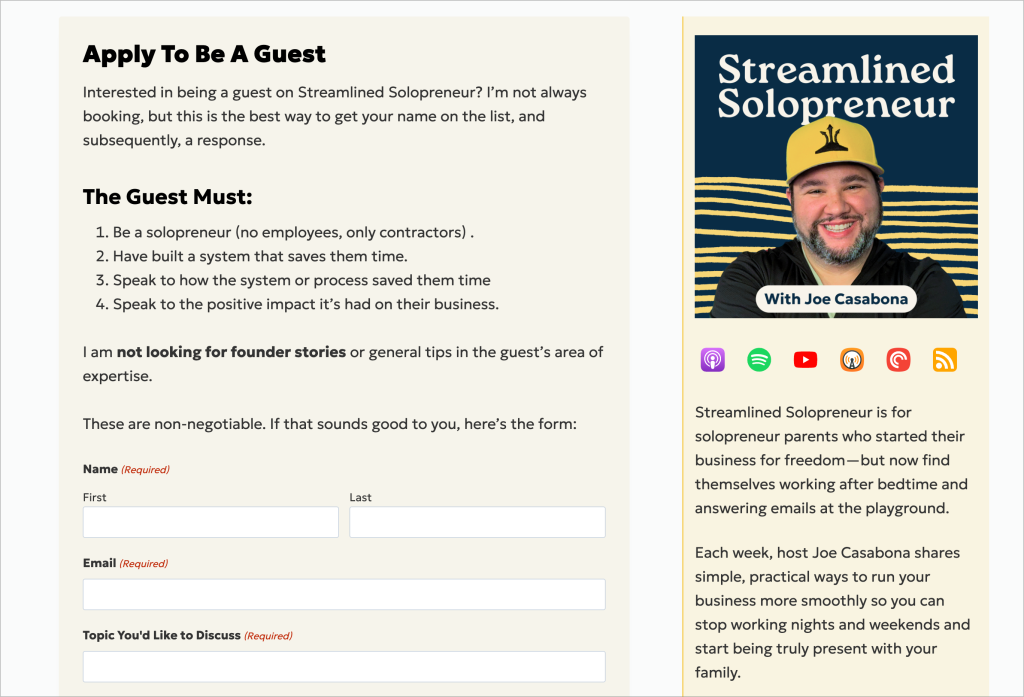
Booking Guests
I’ll get guests 3 ways:
- They apply, I look into them, and I decide if they’d be a good fit for the show.
- I reach out to them and invite them
- We connect on PodMatch
I have a whole research process I go through no matter what.
Once I’m ready to book a guest, I will use Cal.com (a mostly free Calendly alternative) so they can pick a time that works for them. I have specific blocks throughout the week where I record interviews and do meetings.
When they pick a time, they’ll get a calendar invite with a set of instructions, a Riverside.FM link, and a page for recording notes. Cal.com automatically redirects to that page once they’re done signing up too.
It has what to expect, how we’ll record, and some tips for a smooth recording. I’ll also ask what their title is, and their company, so I don’t mess that up in the recording.
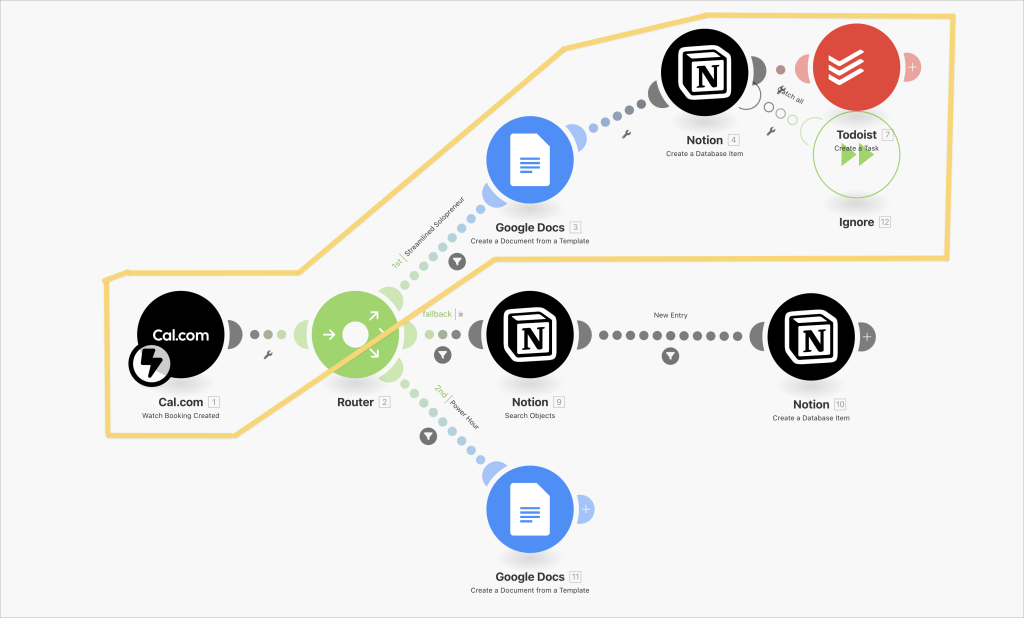
Cal.com Router
I have a Make.com automation setup so that when someone books with Cal.com, several things happen:
- A new Google Doc is generated from a template. It includes all the guest info, and tabs for outline, publish info, and editing notes.
- An entry is added to Notion. This is where I work out the schedule of episodes and where I add the sponsors.
Recording Day
Speaking of, on the day of recording, I’ll get document and relevant links from my research. We’ll speak on Riverside.FM, which will capture audio and video, locally for both me and my guest. Everything sounds super crisp. I’ll also record am audio backup using Quicktime.
After a sound check, I make sure I know how to pronounce my guest’s name, and that we’re both recording our audio. Then we get to it.
At the end of the recording, we wrap up, and I download both tracks separately.
Post-Production
Post-Production is where a lot of magic happens. I collect all of the audio files: my audio, my guest’s audio, the intro and outro bumpers, and sponsor spots.
I put them all in a Google Drive folder I share with my editor. He’ll take it from there with a few instructions from me, in the aforementioned Google Doc. Once he’s done, he’ll put it in a separate Dropbox folder called “Production.”
The “status” field in Notion will also be updated to “Ready for Scheduling” Once that happens, my VA gets an email and will upload the audio, copy, and show notes. She’ll create the transcript, and schedule the episode.
Most of this is done automatically thanks to Zapier, which will trigger status updates and emails in Notion when files in Google Drive change.
Pre-launch Prep
With the audio set, there’s a couple more things that need to be done before launch:
- Create images with Canva. My VA does this using a template I created.
- Put together a simple description and show notes. I’ll write the description. My VA gathers the show notes
- If there is video, I’ll come up with a title and create 2 thumbnails for A/B Testing.
Ideally, I do this for 4-5 episodes at a time.
Controlling Environment Sounds
Aside from improved recording gear for my podcast setup, I’ve gone through great lengths to make sure my environment is perfect for recording.
This includes building a smart “on-air” light and treating the room with sound-absorbing panels. You can see my full desk/office setup here.
That’s About It!
So that’s my whole podcast setup – gear and software. If you have any questions, feel free to leave them in the comments!
