

My Podcasting Setup and Process, Summer 2018
I tend to get a lot of questions about my podcast setup, especially lately. Lots of people want to get into podcasting and I love that! I’ve written about my setup before, and last week wrote about everything on my desk. I touched on some of my gear there, but in this post I want to dig into the real setup, and the current process, as well as improvements I’d like to make.
Podcast Setup: Gear
First, let’s start with the fun part of the podcast setup – the gear. I’ll write everything here in the order in which the audio (my voice) hits the device, starting with the mic.

Microphone: Rode Procaster
The Rode Procaster: My Dynamic XLR mic. I went with this (and most of my equipment) at the recommendation of my friend Shawn Hesketh, who’s a pro with this stuff. I was between this and the Shure SM7B, which is a bit more expensive. The Rode Procaster, Shawn found, was a bit better for the Voice Over (VO) that both of us tend to do. Since I’m not singing, I’m not really in need of something with a huge range. Not to mention, I can tweak with my preamp, which I’ll get to in a minute.
This mic has a cardoid polar pattern, which means it primarily targets the front of the mic, and completely ignores any sound coming from the back. This makes it more forgiving of my environment, which is an upstairs office that shares a wall with my toddler’s room. I’ve used only cardoid mics (the Blue Yeti allows for different polar patterns, including cardoid), but my last XLR was a condenser. It’s generally good for vocals, but in an open room like mine, I want something a little pickier.
Finally, the reason I wanted an XLR mic instead of a USB mic is because USB mics can’t power large diaphragms. Shawn has a great explanation here. Getting an XLR mic, while creating more complexity in the podcast setup, gave me more flexibility in tweaking just how the audio sounds before it hits the computer.
Other Mic-Related Gear
There are a few things attached to my mic, which are worth pointing out:
- Wind Screen: The foam piece on the front of my mic protects it from hard breath sounds, wind, and plosives (hard P-sounds), improving the audio a bit.
- Shock Mount: The outer ring you see on the mic is the shock mount. It cradles the mic so that it doesn’t pick up small knocks and shaking.
- Boom Arm: This is what my mic and mount are attached to. It keeps the mic off my desk, and gives me a lot of flexibility on placement, allowing me to improve my mic technique.

Preamp: ART VoiceChannel
Next up in the chain is my ART VoiceChannel. I plug the mic into this – so all raw, analog audio gets piped into the VoiceChannel for processing. It’s so integral to my work because I can tweak the audio just right, filter out noise, and more. There are a bunch of knobs and such. I’ve spent a lot of time getting things just right, and I think I’m there. After reading Audio Engineering 101, I learned what the knobs do, how to describe sound, and what I need for VO.
The preamp, as well as the rest of the equipment that will get mentioned in this section, sits in a Gator Cases 4 Space Studio Rack. The latest addition to the office. Now all of my audio equipment is organized, on its own power strip, and wires are properly managed. It looks so, so, so much nicer than what I had before, which was a flat surface, where everything was thrown on top.
The Power Strip
I recently picked up an AC Infinity Surge Protector. There were a few reasons for this. The first is to reduced the amount of ground noise. If all the equipment is not on the same strip, it could cause weird white noise or buzzing.
The other reason is that it fits nicely into the rack, so there are no hanging wires or a messy surge protector under the stand.

Interface: Focusrite Scarlett Solo
So the mic goes into the Preamp, and the preamp could actually go directly into the computer via USB. But in doing that, I didn’t really like the sound I was getting…I’m not exactly sure why. I was also unable to monitor the audio with my AT-50s, which is something I really like to do.
The Focusrite Scarlett Solo was my first device when I moved to XLR and since I have a preamp, and 1 mic, it’s all I really need. It’s less than $100 and does the job very well.
Alternate: Apogee Duet
I bought an Apogee Duet, which is a really nice interface that gives you a lot more control and multiple inputs, but unfortunately, it only works with Mac. And, well, I recently made a change…
Podcast Setup: Production Process
I’ve covered all but one piece of equipment, and that one piece changed a big part of my podcast setup and process. Earlier this year I switched my production machine from a Mac to a PC – an Alienware to be exact. I’ll have a separate write-up on that soon but ultimately, I needed more power than I was getting from a 2017 maxed-out Macbook Pro.
With that little preamble, here’s my process from booking a guest to releasing the episode.

Booking Guests
I’ll get guests 2 ways: 1) they reach out to me, I look into them, and I decide if they’d be a good fit for the show. Or 2) I reach out to them. Both ways work great and I’ve gotten very few nos. I’ve said no a lot more than I’ve been said no to.
Once I’m ready to book a guest, I will use Calendlyso they can pick a time that works for them. When they pick a time, they’ll get a calendar invite with a set of instructions, and this show notes gist. It has the usual questions, how to record their side of the audio, and some tips for a smooth recording. I’ll also ask what their title is, and their company, so I don’t mess that up in the recording.
Recording Day
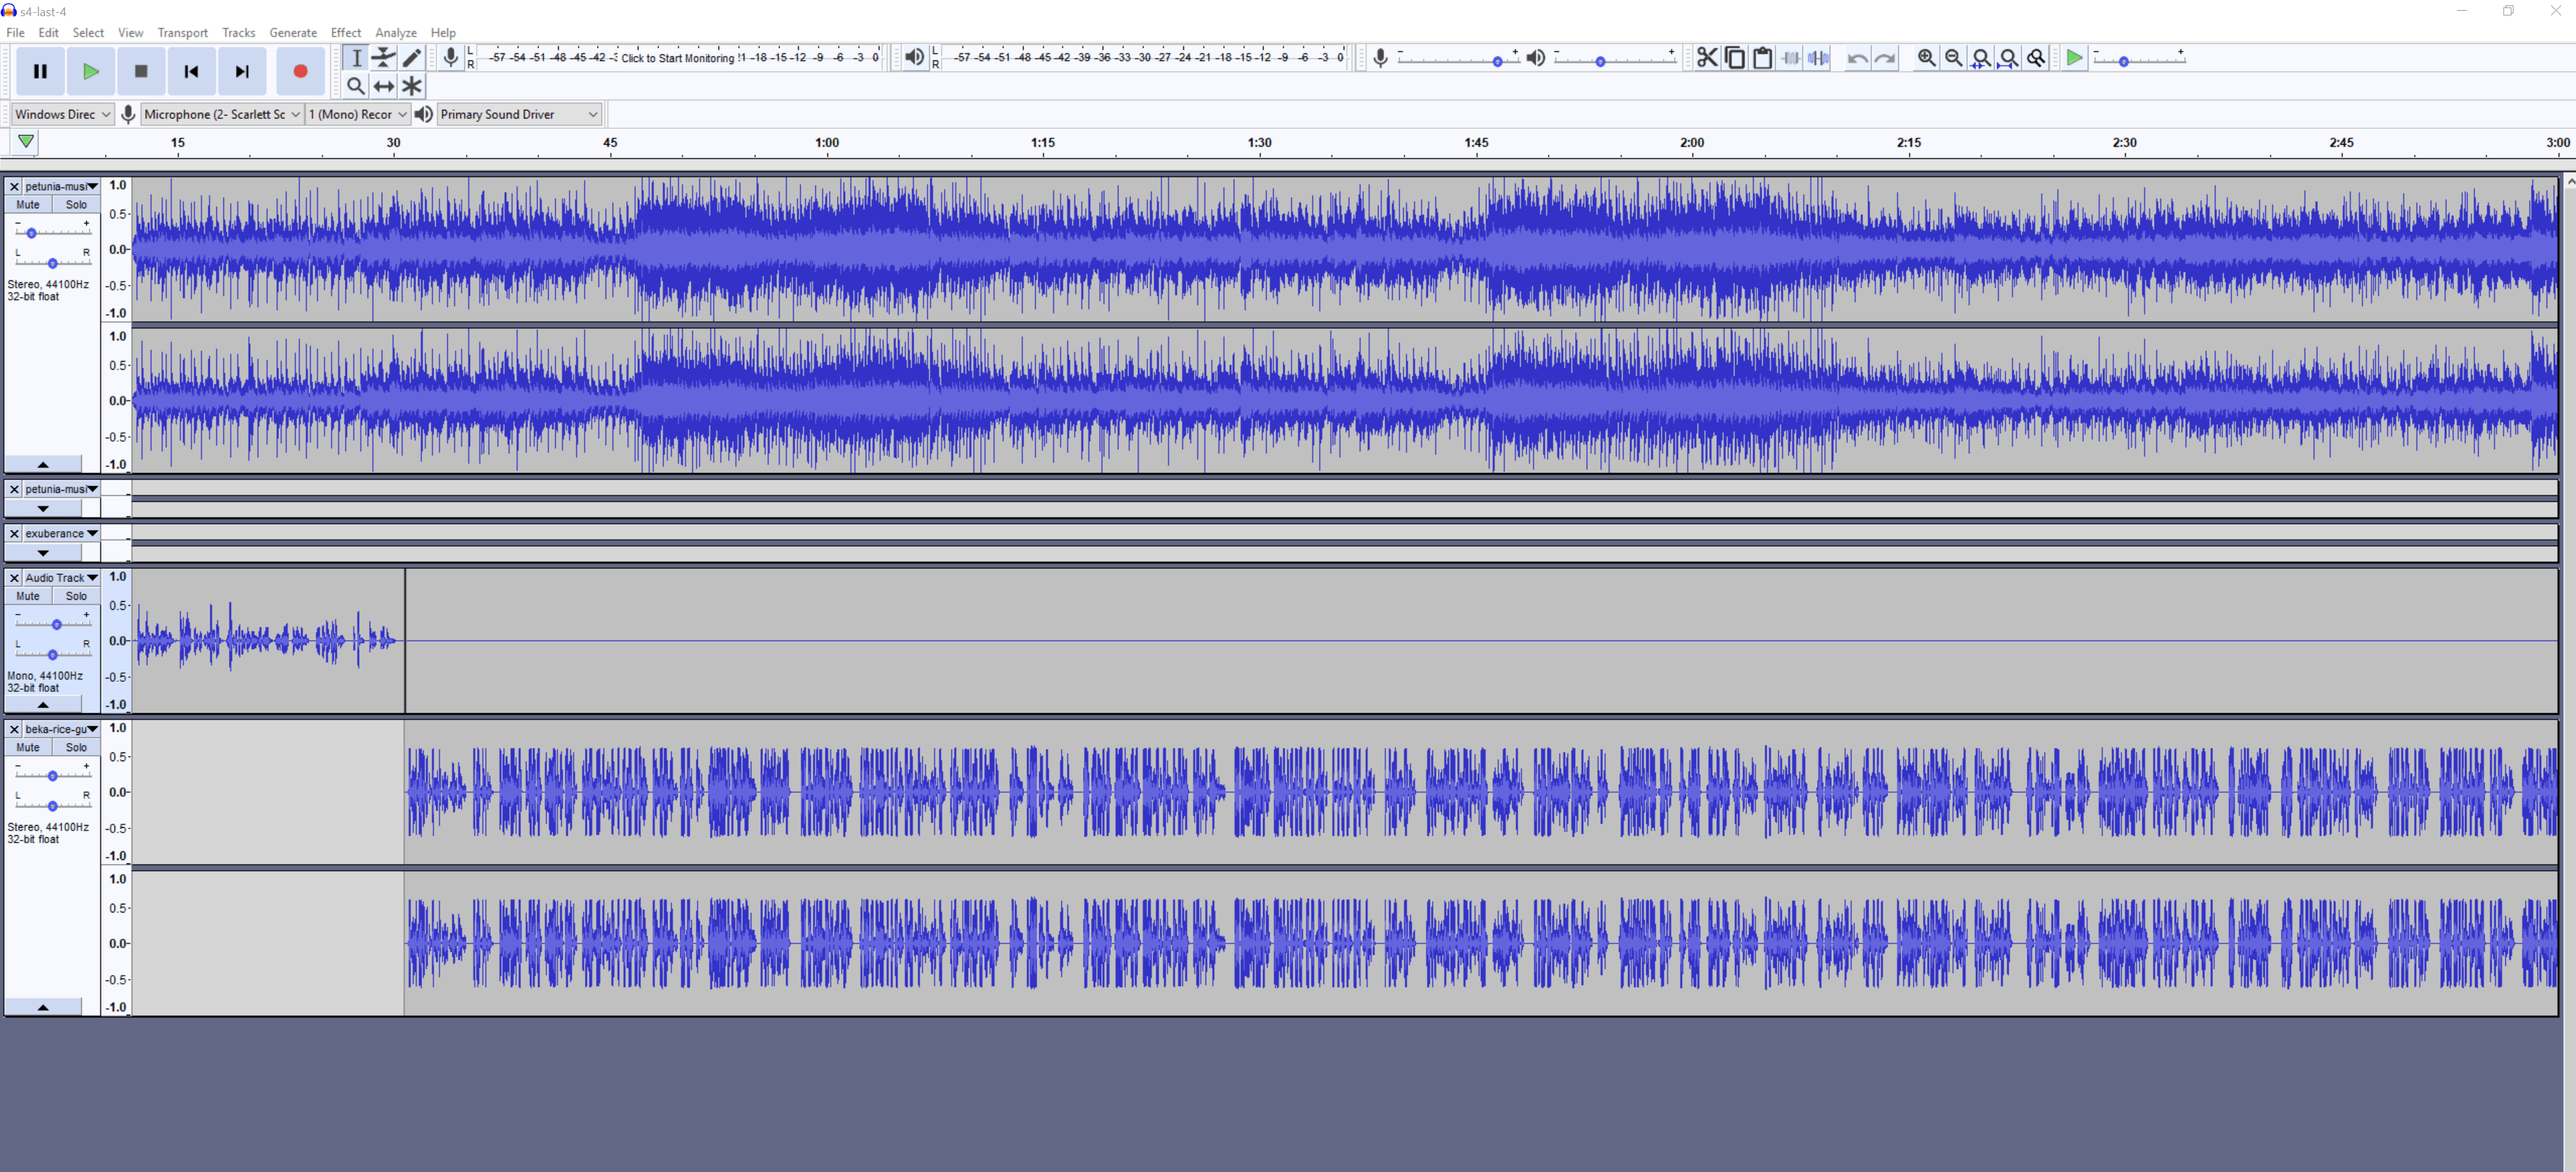
Speaking of, on the day of recording, I’ll get that gist and relevant links. We’ll speak on Skype (I like to see my guests, even if we don’t use the video). I’ll record my audio directly to Audacity, which is what I use to “edit” my episodes (more on that in a minute).
After a sound check, I make sure I know how to pronounce my guest’s name, and that we’re both recording our audio. Then we get to it. At the end of the recording, we wrap up, and they send me their audio.
Post-Production
Post-Production is a 3 step process for me. First, I’ll send off both sides of the audio to my editor. He’ll clean up and combine that audio, and send it back to me. He’s someone I found on Fiverr when my show first started, and he’s been a great resource for me.
Once I get the audio back, I ship it to Rev.com for transcription. During that time, I’ll write out the bumpers – the beginning and end of the show. In those, I’ll describe the episode, thank the guest, and do sponsor reads. I don’t have those transcribed because they are scripted. Finally, I’ll clean up the transcript. Fix any misspelling or areas marked “incoherent,” tighten up the dialog to make it more readable, and add the bumpers. This is the most time consuming part for me.
Lastly, I’ll open up Audacity for final edit. I’ll add the edited episode, record the bumpers, and add music. I get my music from Music for Makers. Then I export the audio and upload it to Libsyn, my audio host.

Pre-launch Prep
With the audio set, there’s a couple more things I do before launch:
- Create images. I make an episode image and a quote image to share on social media
- Put together a simple description and show notes
- Upload the transcript
- Create an automated list of Tweets on Social Jukebox for promotion.
Then I schedule the episode. Ideally, I do this for 4-5 episodes at a time; this highly depends on what sponsors I have and when I get their assets.
Controlling Environment Sounds
Aside from improved recording gear for my podcast setup, I added three things to my office to diminish outside sounds. This is important, since as I stated before I’m in an upstairs office that shares a wall with my daughter.
- Book Shelves: My book shelves, right behind me, diffuse any sound bouncing off the wall and back into my mic, so there is no chance of an echo.
- Auralex DeskMax Sound Panels: These bad boys provide a little extra soundproofing/dampening, and prevent echo off the wall that’s very close to my desk.
- Blackout Curtains: I got some blackout curtains for my windows, which dampen sound by 60%. Between those and the noise gate on my preamp, I get no outside noise in my recordings.
Improvements
That’s the whole podcast setup and process! There are a few places I’d like to improve though.
Recording
I’d like to set a few “Recording blocks” on my calendar each week. Right now, a guest can pick any open time slot. I’m trying to be better at time boxing, and that will help.
I also want to revisit using a service like Zencastr. This will automatically record both sides of the audio, locally, and possibly even combine them. This will make my guest’s job easier. But I’ll lose video, and it didn’t work that well last time I tried it. I’ve heard it’s made some big improvements though.
Post-Production
I hate Audacity so I want to try something else. My friend Mike, who’s an audio engineer, recommended Pro Tools. I don’t do a whole lot of editing, so I want the things I do to be easy. Plus Audacity is so. ugly.
I also want to streamline the transcript process and try to save some money there. I’ve been thinking about using a machine transcription service, but it usually adds more work. I’ve also toyed with doing blog-post-like descriptions instead of transcripts, as they’d be much more enjoyable to read. Still thinking on that one.
That’s About It!
So that’s my whole podcast setup – gear and software. If you have any questions, feel free to leave them in the comments!
Love the show man and this is a great insight into your process. A few surprises here — Audacity!? Also, I am interested in your switch to PC from Mac. I’ve just done this too and it is (kind of) working out OK. Would like to hear more about how you are getting on with this transition.
Anyway, keep up the great work dude.
All the best
Tommy